Introduction
No-till gardening is a method of growing plants without disturbing the soil. Instead of tilling or turning the soil, gardeners plant directly into the soil or use a layer of organic matter to cover the soil. The purpose of this article is to explore the environmental benefits of this gardening technique. No-till gardening is gaining popularity as people become more aware of the negative impact of traditional gardening practices on the environment. By not disturbing the soil, no-till gardening helps to preserve the soil structure and reduce erosion. It also promotes healthy soil by allowing beneficial microorganisms to thrive, which in turn helps to improve soil fertility. Additionally, no-till gardening can help to reduce water usage by improving the soil’s ability to retain water. Overall, no-till gardening is a sustainable and environmentally friendly approach to gardening that offers numerous benefits for both gardeners and the environment.
Setting Up Your No-Till Garden
Tools
To start a no-till garden, you will need a few basic tools. You will probably add tools as the need arises. But for starters here is a short list of garden tools:
- A garden fork or a broad fork to loosen the soil without disturbing it. Garden forks are used to break up the top layer of soil without turning it over. This process helps to aerate the soil and improve drainage.
- A push-pull hoe or a scuffle hoe to remove weeds. Hoes are useful for removing weeds in between rows of plants, whereas scuffle hoes are designed to remove weeds without disturbing the soil. See my post on garden hoes.
- A garden rake to level the soil and remove debris.
- A wheelbarrow or garden cart to move materials to where they are needed, and later to haul your harvest to the house.
Having these basic tools makes it easier to begin your no-till garden and enjoy the benefits of this sustainable and healthy gardening method.
"Here's a little transparency: Our website contains affiliate links. This means we may receive a small commission if you click and make a purchase. Don't worry; there's no extra cost for you. It's a simple way you can support our mission to bring you quality content."
Material for the Lasagna Method
The lasagna gardening method, also known as sheet mulching, is a no-dig, organic gardening method. Here are the ten most commonly used materials for this method:
- Cardboard or Newspaper (Weed Barrier): These materials act as the bottom layer in lasagna gardening, suppressing weeds and grass. They can be easily sourced from local businesses, friends, neighbors, and recycling centers, where they're often available in abundance.
- Leaves (Brown Material): Fallen leaves are excellent for creating a balanced compost environment, being a key carbon-rich component. Gather them from your yard, or ask neighbors and local communities, especially during autumn when leaves are plentiful.
- Straw or Hay (Brown Material): Adding bulk and helping to retain moisture, straw or hay is vital as a carbon-rich layer. These can be purchased from local farms, garden centers, or animal feed stores. Ensure they're free from herbicides.
- Wood Chips or Bark Mulch (Brown Material): Useful for moisture retention and nutrient addition, these can be obtained from tree service companies, local parks, or garden centers. They're often used as a top layer but also contribute to the carbon balance. Both are popular choices for mulching. They break down slowly, improving soil texture and fertility over time. Wood chips are especially good for paths and around trees and shrubs, while bark mulch is often used in flower beds and vegetable gardens.
- Leaf Mold (Brown Material): This is partially decomposed leaves, excellent for moisture retention and organic matter addition. Create your own from collected leaves or look for community leaf composting programs.
- Composted Wood Chips (Brown Material): These improve soil structure and retain moisture. Source them from tree services or by composting your wood chips, also available through community gardens or local compost programs.
- Shredded Bark (Brown Material): It helps with moisture retention and soil conditioning. Available at garden centers and landscape supply companies, ensure it's well-aged to avoid nitrogen depletion in the soil.
- Composted Pine Needles (Brown Material): Suitable for slightly acidic conditions, they can be made through personal composting or gathered from local forest areas (with permission).
- Composted Yard Waste (Brown Material): Incorporate your garden waste or utilize community compost programs to recycle plant trimmings, grass clippings, and leaves.
- Rice Hulls (Brown Material): These improve soil aeration and moisture retention and can be sourced from breweries or agricultural supply stores. They are lightweight and can be used as a mulching material, especially around small plants and in container gardens.
- Sawdust (from untreated wood) (Brown Material): Ensure it's from untreated wood to avoid chemicals. This can be sourced from woodworking shops or lumber mills. It can be used as mulch, but it's best used around paths or non-vegetable areas since it can tie up nitrogen in the soil as it decomposes.
- Pine Bark Fines (Brown Material): Effective for improving soil structure and moisture retention, these can be found at landscape supply companies and garden centers. These are effective as a mulch. A common belief is that using this can lower the soil pH, but some studies refute that belief.
- Grass Clippings (Green Material): Rich in nitrogen, these are essential for lasagna gardens. Collect from your lawn or obtain from neighbors or local lawn care services (ensure no chemical treatments).
- Manure (Green Material): Adding vital nutrients, well-aged manure can be sourced from local farms, stables, or horse/livestock owners. This enriches the growing environment significantly.
- Vegetable Scraps (Green Material): Kitchen scraps like fruit and vegetable peels add nitrogen. Save your own or ask local produce stores for unsellable fruits and vegetables.
- Green Garden Waste (Green Material): This includes plant trimmings and old annuals, providing nitrogen and balancing carbon-rich materials. Source from your own garden or community garden programs.
- Mushroom Compost (Green Material): A nutrient-rich peat moss alternative, it can be obtained from mushroom farms or garden centers.
- Homemade Compost (Green Material): An excellent soil conditioner, homemade compost can be made from yard and kitchen waste. It improves moisture retention, adds nutrients, and enhances soil structure.
- Green Compost Materials (Green Material): Comprising grass clippings, vegetable scraps, and coffee grounds, these break down quickly and add essential nutrients. Utilize your own garden and kitchen waste, and participate in community compost programs.
- Spent Coffee Grounds (Green Material): Useful for moisture retention and adding organic matter. Collect from your coffee consumption or acquire from coffee shops and local cafés.
- Aged Animal Manures (Green Material): Contribute to soil fertility and structure. Source from local farms, stables, and livestock owners.
- Compost (Top Layer/Mulching): A crucial component for adding nutrients, homemade or purchased compost can be layered throughout the lasagna garden and serve as a top mulching layer. Create your own or look for community compost programs and garden centers for supplies.
Combined Steps to Building and Transitioning For a No-Till Garden
Assessment and Planning
From Scratch
Choose a sunny, well-drained location with good access to water and avoid areas with invasive weeds. For more information see the post on garden design.
Transition
Evaluating the existing garden's soil condition and plant health is a multifaceted process that gives invaluable insights, especially when transitioning to a no-till system. Begin by assessing the soil texture and structure; healthy soil should be loamy, with a balanced feel between grittiness and stickiness, and have a crumbly, granular texture. Soil compaction is another key factor; test this by checking how easily a garden fork or probe enters the soil. Highly compacted soil, which is difficult to penetrate, suggests poor aeration and drainage. The soil's moisture content also needs assessment – it should be consistently moist, not overly dry or waterlogged.
Pest and disease incidence can also reflect soil health; a high occurrence often indicates underlying problems and weakened plant resilience. Additionally, the type and quantity of weeds in your garden can offer clues about the soil conditions, as certain weeds thrive in specific environments like acidic or compacted soils. Lastly, the presence of earthworms and other soil organisms is a positive sign, indicating active soil life that contributes to improved structure, aeration, and nutrient cycling. Regular monitoring and making gradual amendments based on these observations are key to successfully transitioning to a productive, resilient no-till garden.
Soil Testing (Optional, but recommended)
Both
Conducting a soil test can reveal vital information about pH levels and nutrient content, including nitrogen, phosphorus, and potassium. This is often done using test kits available at garden centers or through local extension services. Alongside soil analysis, observe the health and vigor of the plants in the garden. Indicators of healthy plants include strong growth, deep green foliage, and robust flowering or fruiting, depending on the species. Conversely, signs like yellowing leaves, stunted growth, or a lack of flowering can point to nutrient deficiencies or other issues.
Please read my post on The Essential Guide To Sustainable Heirloom Gardening Practices for a more holistic view.
Define the Garden Area
From Scratch
When planning your garden, it's crucial to mark out the boundaries of the beds. Doing so will help you visualize the space and ensure that you have enough room for all the plants you wish to grow. While marking out the boundaries, you should consider access and pathways. It's important to leave enough space for walking and working so that you can easily reach all areas of the garden. You may also want to create some paths that are wide enough to allow a garden cart, wagon, or wheelbarrow to roll through.
Transition
To improve your garden's layout, you may need to reassess and possibly redefine the existing layout. Taking into account the things talked about above.
Weed and Grass Suppression
From Scratch
Lay down cardboard or newspaper as a weed barrier. You will probably want to have several layers of newspaper to be an effective weed barrier.
Transition
If you are transitioning your beds in phases, it's important to allow the beds to be weedy during the first year of the transition. Before the weeds set seed, make sure to crimp them at the ground level just like you do with cover crops. By doing so, you'll be able to add them to the bed as organic material, and their roots will help in building the soil.
Add Organic Layers
To begin, add a layer of brown organic materials such as leaves, straw, compost, and manure. Then, add a layer of green materials. Remember to water each layer as you go. This layering method creates a bed of organic matter that will eventually break down and become rich soil. As the organic materials decompose, nutrients are released into the soil which plants use to grow strong and healthy. The lasagna method is effective in creating a garden bed without tilling the soil, which can disrupt the natural ecosystem and harm beneficial organisms. By layering organic materials on top of each other, you can create a healthy and sustainable garden that will provide fresh fruits and vegetables for years to come.
Transition
If you're adding organic layers to an existing soil, apply layers of up to 4 inches directly on top of it, followed by organic mulch.
From Scratch
If you're starting a new garden bed, build these layers up to 12-18 inches.
Top with Mulch
Both
When applying mulch to your no-till garden, evenly spread your chosen mulch material - such as straw, leaves, wood chips, or grass clippings - over the garden bed. Aim for a layer about 2-4 inches thick, which is ideal for suppressing weeds and retaining moisture, yet thin enough to avoid suffocating the soil. Take care to leave a little space around the base of plants to prevent potential rot and ensure proper air circulation.
If you're using dry materials like straw or leaves, give them a light watering after application. This helps the mulch settle and prevents it from being blown away. Over time, as the mulch begins to break down, it will contribute to the soil's overall health. Therefore, it's important to regularly check the thickness of the mulch layer and replenish it as needed to maintain the desired depth. Finally, consider the seasonal changes in your garden. For instance, a thicker layer of mulch might be beneficial during colder months to protect the soil from freezing, whereas a lighter layer can be more suitable in warmer months to prevent excessive moisture loss. This dynamic approach to mulching is integral to maintaining a healthy, productive no-till garden throughout the year.
Allow Soil to Develop
Both
It is recommended to allow the layers to decompose for several weeks to a few months. The ideal time to place the layers is during the fall to early winter. Once spring comes, the beds should be ready for planting. However, if the beds still have many big pieces, then it may be necessary to add a thick layer of mature compost before planting. The layers underneath will continue to decompose, thus enhancing the soil quality over time.
Planting
Both
Direct Sowing Seeds: When direct sowing seeds in a no-till garden, it's important to work carefully with the top layer of compost. First, gently clear a small area of the mulch where you plan to sow the seeds. To plant your seeds directly into the compost layer, you should follow the depth and spacing guidelines specific to each type of seed. You can use a stick or dowel that is marked to the proper depth to make a hole and drop in the seed. As no-till soil is typically loose and rich, you can easily cover the seeds with a light layer of compost or soil without compacting it. After sowing, replace the mulch around the planting area, being careful not to cover the seeds themselves. This helps maintain moisture and temperature levels ideal for germination while keeping the soil undisturbed. It is crucial to water plants regularly according to their needs, and this can be easily done using a soaker hose already placed in the bed.
Transplanting Seedlings: Transplanting seedlings into a no-till garden requires a delicate approach to minimize soil disturbance. Start by moving aside the mulch in the area where you plan to plant. Using a hand trowel or a similar tool, make a hole in the compost layer just large enough to accommodate the seedling's root ball. Gently place the seedling into the hole, making sure to plant it at the same depth as it was growing in its previous container. However, for certain plants like tomatoes, it is recommended to plant them deeper in the soil. Gently firm the compost around the seedling to secure it in place, but avoid compacting the soil heavily. Once the seedling is planted, replace the mulch around it, leaving some space around the stem to prevent rot and to ensure adequate air circulation. Water the seedlings thoroughly after planting to help establish them in their new environment. For more detail about growing transplant from seed see my post on seed starting.
In both direct sowing and transplanting, the key is to disturb the soil as little as possible, maintaining the integrity of the no-till garden's structure. This approach promotes a healthy, thriving ecosystem in your garden, conducive to plant growth and soil health.
The Year for a No-Till Garden
Maintaining a no-till garden throughout the year involves a series of seasonal activities tailored to support the garden's ecological balance and productivity. Each season brings its own set of tasks, from preparing and planting in the spring to harvesting and winterizing in the fall. By understanding and adapting to these seasonal requirements, gardeners can ensure their no-till garden remains healthy and vibrant year-round. Below is a comprehensive guide outlining the key activities for each season in a no-till garden.
In spring, the no-till garden requires a thorough assessment and any necessary repairs to structures like fences and trellises. This is also the time to replenish mulch layers to suppress emerging weeds and maintain soil moisture. As the weather warms, begin planting seeds and transplanting seedlings, keeping in mind the local frost dates. Regular watering should commence.
As summer approaches, it becomes crucial to water your plants regularly, especially during dry spells. Make sure to maintain a mulch layer to help keep the soil moist and prevent weed growth. This is also the perfect time for Integrated Pest Management (IPM) practices. Regularly check your plants for signs of pests and diseases, and use environmentally friendly methods to control them as needed. You can introduce beneficial insects or use organic sprays. Continuously removing weeds and promptly harvesting your crops is an effective way to prevent pest and disease buildup. Succession planting is also a great way to keep your garden productive by planting new crops as spaces become available after harvesting.
Autumn is the time to sow seeds for cool-weather crops and continue harvesting. After harvest, add compost and other organic materials to the beds. Preparing the garden for winter includes planting cover crops or applying a thick layer of mulch for soil protection. It's also an ideal time for garden tool maintenance and planning for the next season. Ensuring that the soil remains covered, whether with mulch, cover crops, or planted crops, is crucial for preventing erosion.
During winter, focus on planning for the next gardening season, reflecting on the past year’s successes and challenges. Monitor any winter beds with cover crops or winter-hardy plants, ensuring they're well-maintained. Check the mulch regularly to keep the soil protected. This season is also suitable for garden infrastructure projects, such as building new beds or repairing existing ones.
Throughout the year, a no-till garden benefits from careful observation and gentle intervention. By adapting these practices to your garden's specific needs and local conditions, you can ensure a thriving, environmentally harmonious garden ecosystem.
Please read my post on The Essential Guide To Sustainable Heirloom Gardening Practices for a more holistic view.
Conclusion
Adopting a no-till gardening approach can offer profound long-term benefits for both your garden and the environment. By maintaining the natural structure of the soil and minimizing disturbance, no-till gardens foster a thriving ecosystem beneath the surface. This method can enhance soil fertility, improve water retention, and support a rich microbial life, ultimately leading to healthier and more resilient plants. Furthermore, integrating holistic practices into this system underscores your commitment to sustainable and environmentally responsible gardening.
No-till gardening is not only a step towards sustainable cultivation but also a deeply rewarding experience. It allows you to work closely with nature, and observe and learn from the rhythms of the natural world. By starting this practice, you can contribute to a healthier planet, one garden at a time.
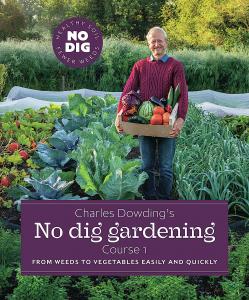
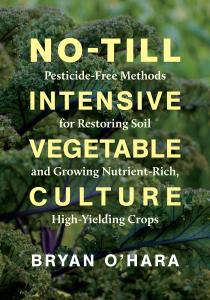
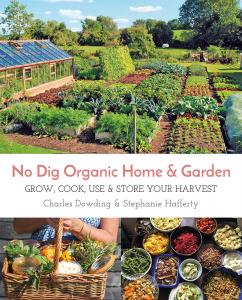
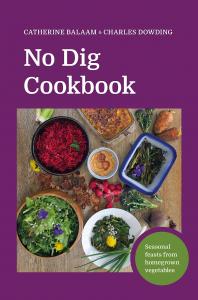
If you're interested in deepening your understanding and skills in no-till gardening and sustainable practices, plenty of resources are available. Books, online forums, and community gardening groups offer a wealth of information. Local extension services and gardening clubs can provide tailored advice and support. Additionally, workshops and webinars on organic gardening, soil health, and pest management are invaluable for continuous learning and connecting with like-minded gardeners.
Embracing no-till gardening is a step towards a more sustainable future. It's an invitation to nurture the land that feeds us, foster biodiversity, and cultivate a deeper connection with the environment. So, take the leap, enrich your gardening experience, and watch as your garden becomes a vibrant testament to the power of working harmoniously with nature.
Please feel free to share any questions, comments, stories, or anything else you'd like to express in the comments section.


This blog provides a thorough guide to the no-till gardening method, emphasizing its environmental benefits and practical implementation. It covers tools, materials, and step-by-step processes for both starting from scratch and transitioning existing gardens. The inclusion of seasonal activities highlights the method’s year-round advantages. Overall, it serves as a valuable resource for those interested in adopting a sustainable and environmentally friendly gardening approach.
Thank you for your positive feedback on our guide to no-till gardening! We’re delighted to hear that you found the information on tools, materials, and step-by-step processes helpful, especially in understanding how to implement this method in both new and existing gardens. It’s great to know that the seasonal activities section highlighted the year-round benefits of no-till gardening. Our aim is always to support gardeners in adopting more sustainable and environmentally friendly practices. If you have any questions or need further guidance as you explore no-till gardening, please feel free to reach out. Happy gardening!
What are the best flowers to plant in the fall for a vibrant spring garden?
Great question! The best spring flowers to plant in the fall depend on your planting zone. Here are some tips for every region:
Zones 3-5 (Cold regions): Stick with tough bulbs like Darwin tulips, daffodils, and grape hyacinths. Plant them 6-8 inches deep before the ground freezes—they need that winter chill to thrive.
Zones 6-7 (Moderate climates): You’ve got so many options! Try layering bulbs for a spring show that blooms in waves. Plant tall tulips deepest, then daffodils, and finish with crocuses on top—this “bulb lasagna” is as fun as it sounds!
Zones 8-10 (Warm regions): If you love tulips and hyacinths, pre-chill the bulbs in your fridge for 6-8 weeks before planting. Or choose warm-climate champs like freesias, ranunculus, or paperwhites for low-maintenance beauty.
Pro tip: Whatever your zone, sprinkle some bone meal in the planting hole for a nutrient boost, and plant in clumps of 5-7 bulbs for a natural, eye-catching look. Happy planting!